Bureaupixel, a site on online publications, data, graphic- and sound design, content management systems, datasets and innovation.
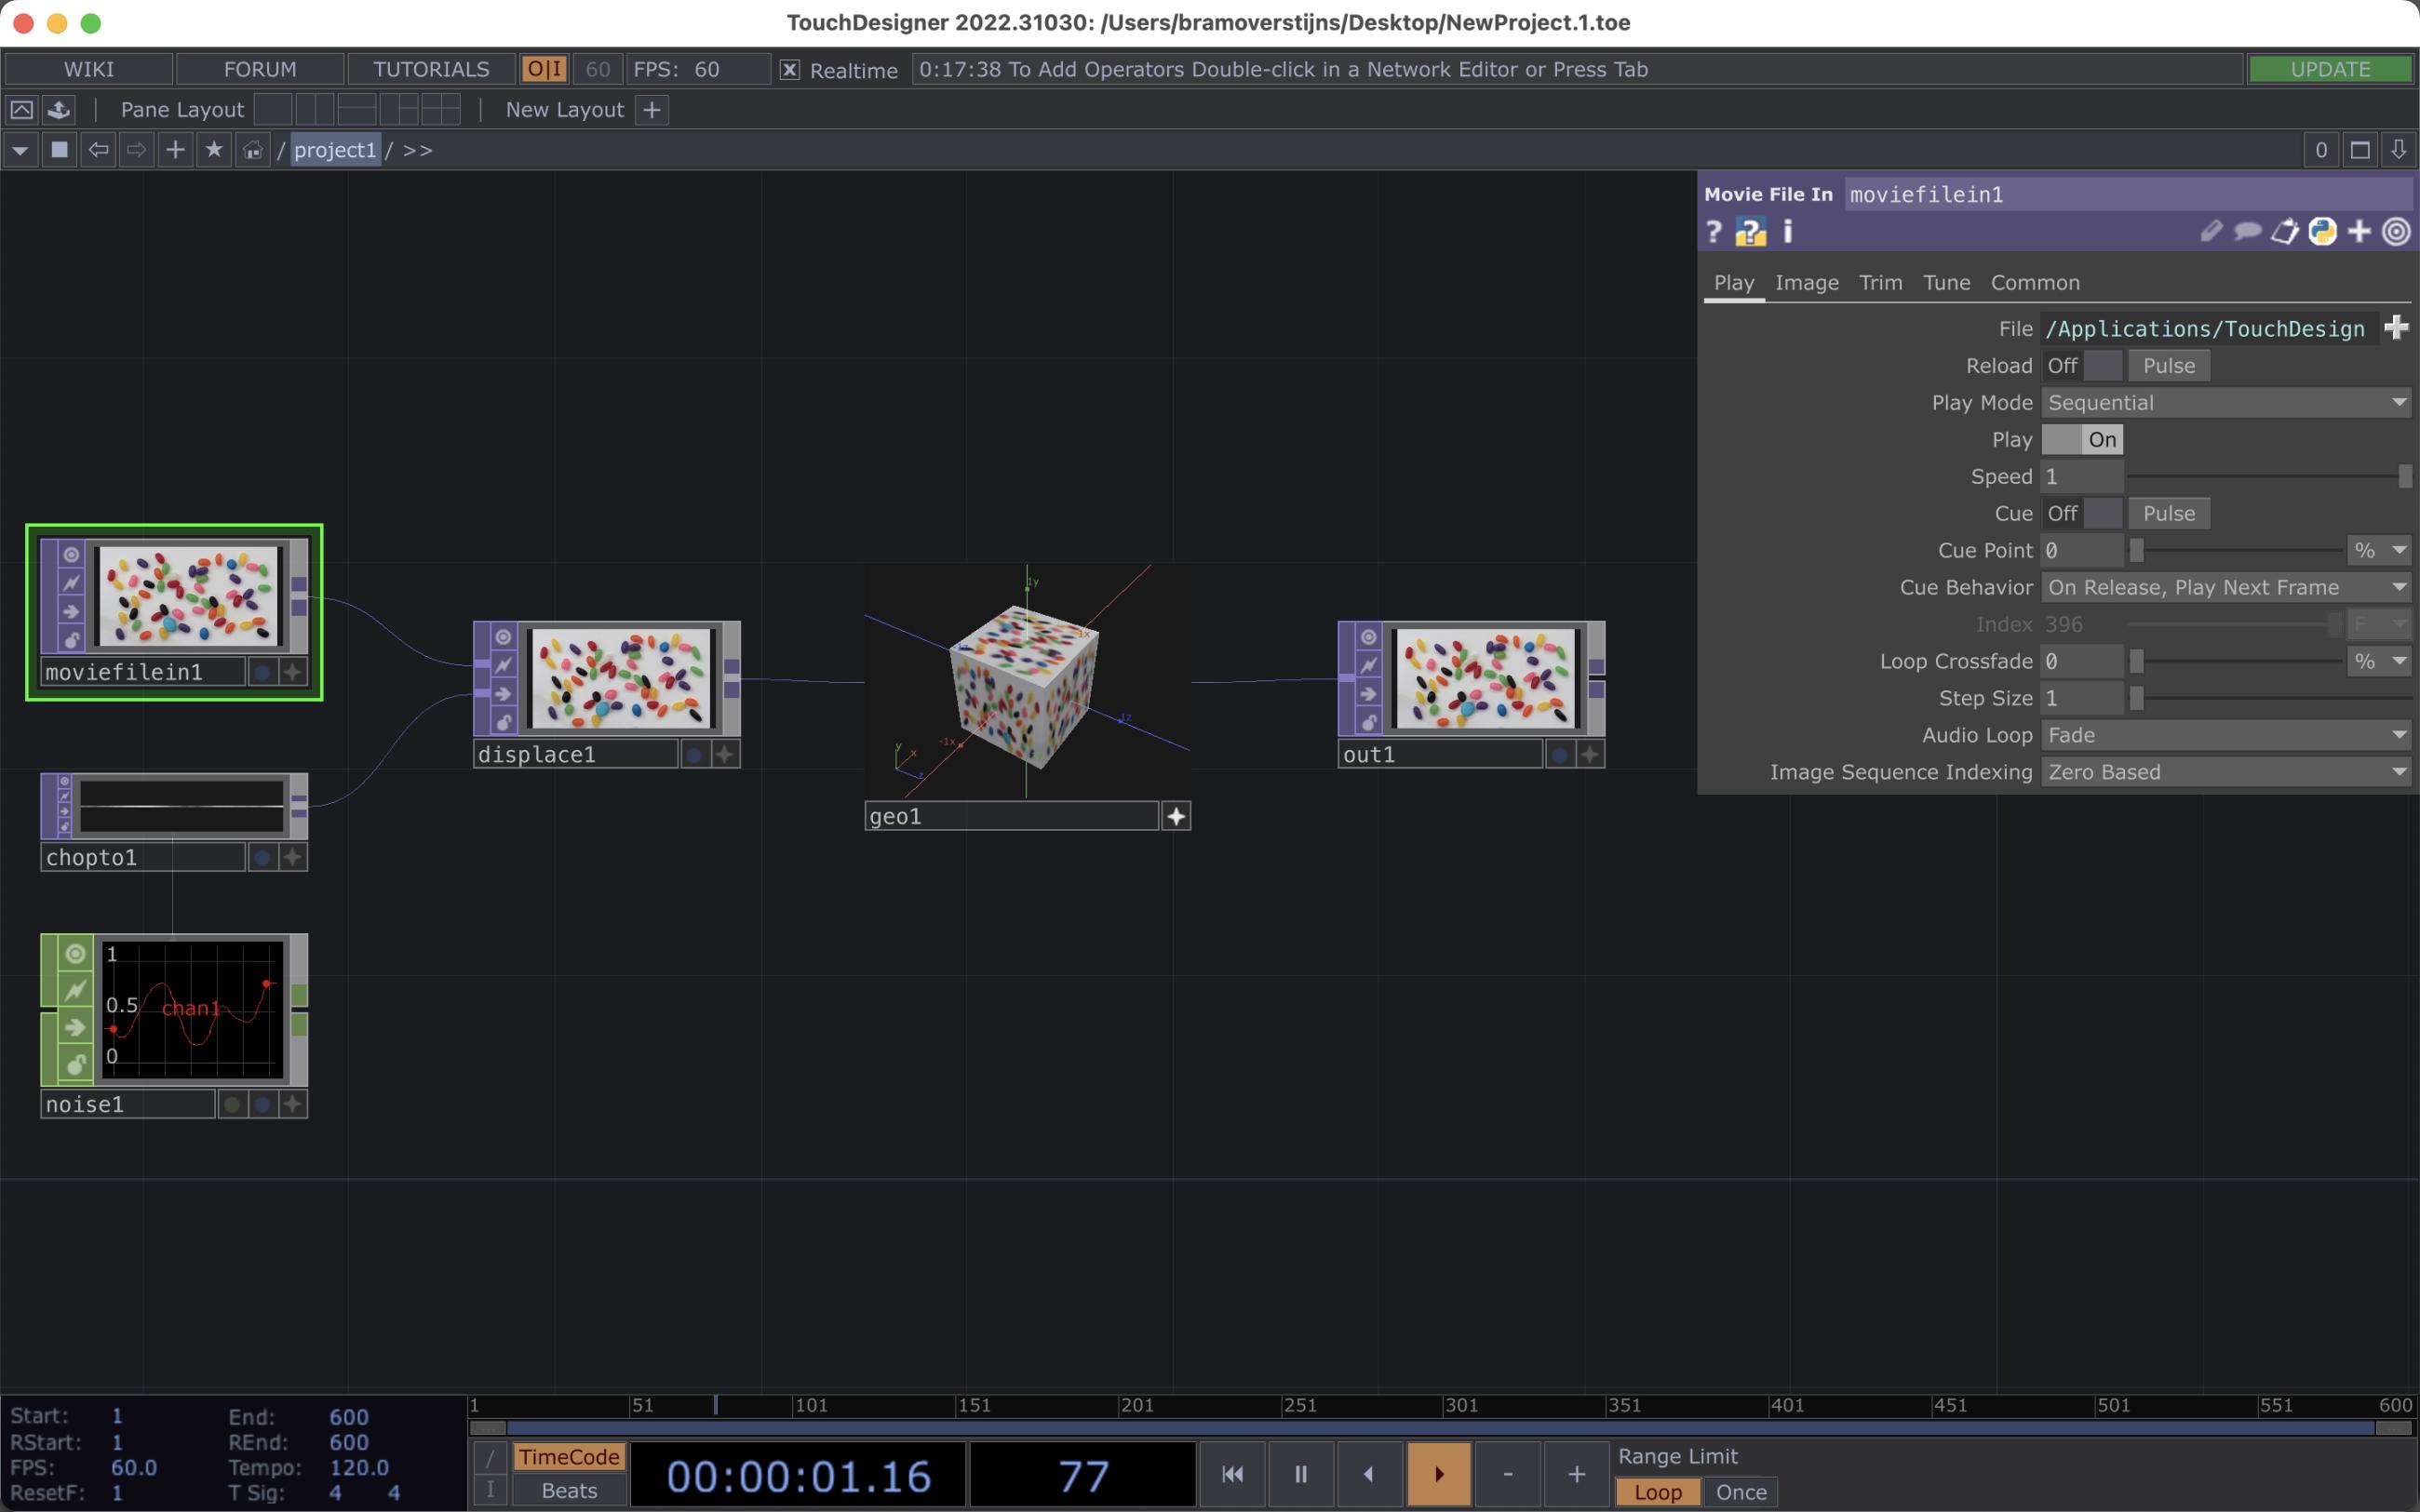
For this example we start of with a new file in Touchdesiger: opening a new file starts with a basic network with some basic nodes: nodes to get image data into the network, nodes that provide random data to alter the image, a nodes that changes the image data according to the current value of the random data and a node that sets the output of the altered image. Briefly said: the network contais nodes that will import, alter and output the image data.
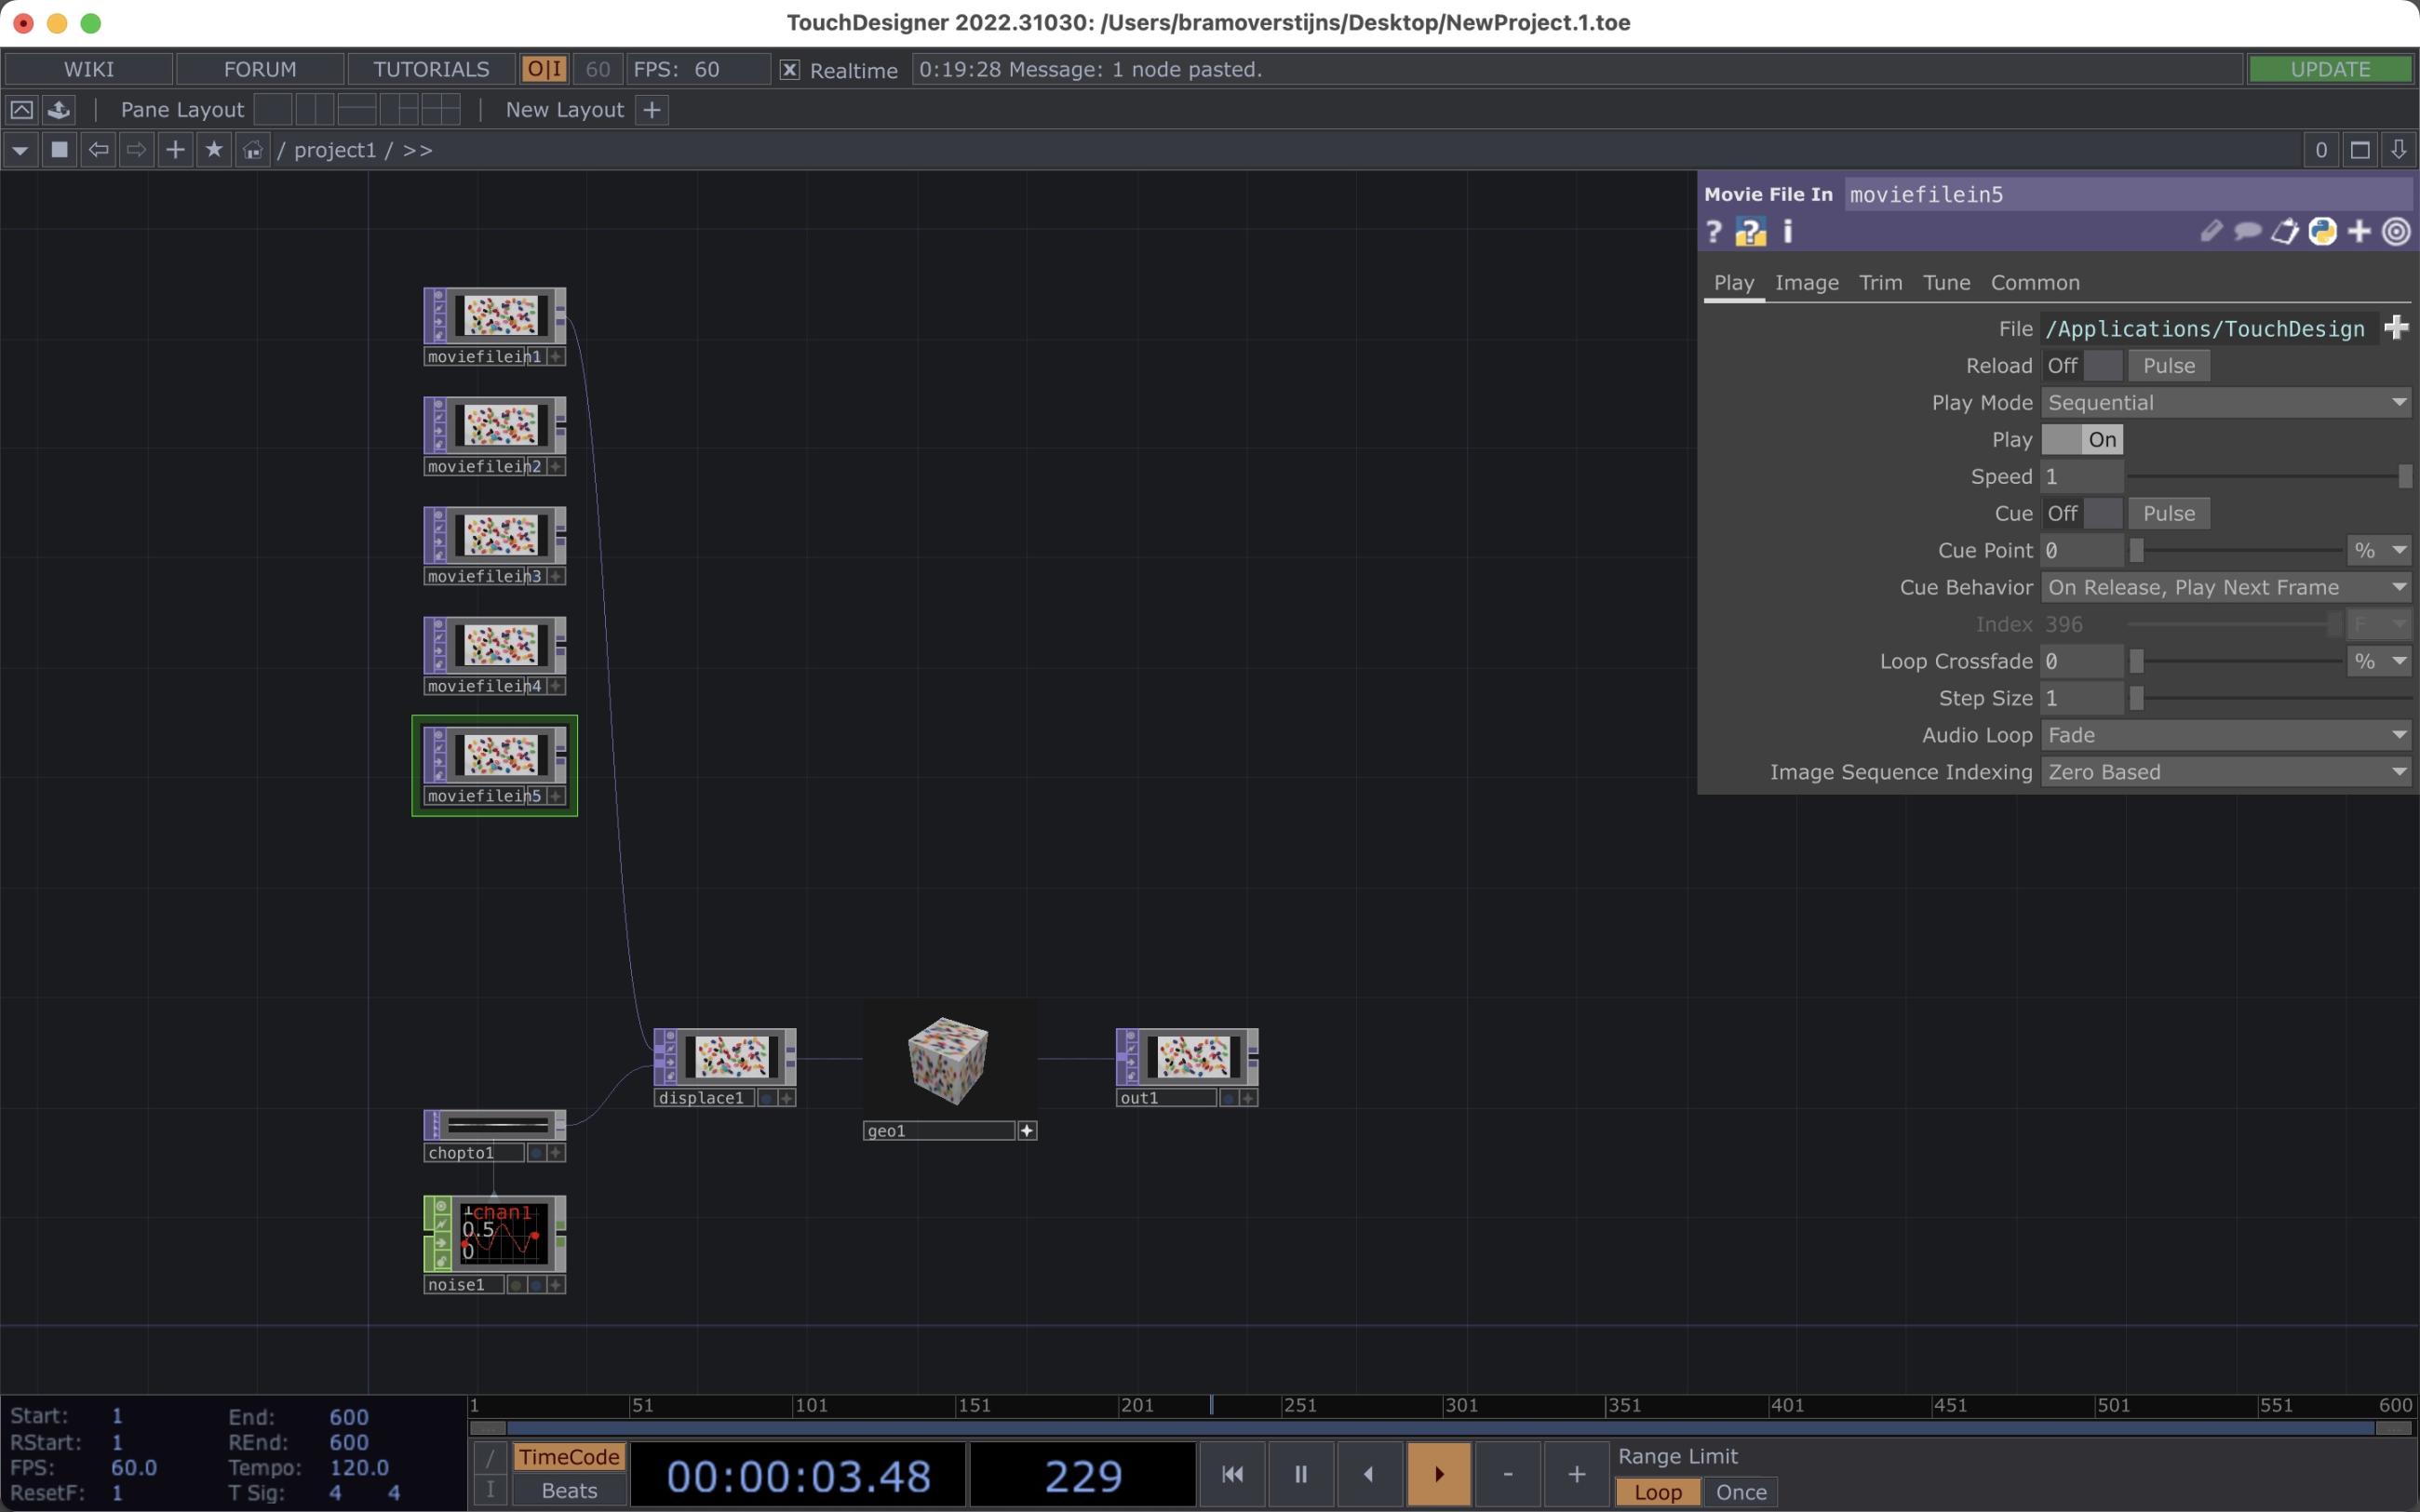
Start off by duplicating the MovieFileIn Top, according ot the number of videos you want to use in your project. For each duplicated top you will need to alter the data that comes in (the file with the corresponding video). Therefore we need to copy those files into a folder in the work directory that your Touchdesigner project will be saved.
All examples in the example are from the following link: https://www.switzonwigfall.com/vjclips
Create a folder called "assets" in the rootfolder of your project and copy the videofiles into this folder.
We will get back to resolution of your images in a later stage of this tutorial: the output of the basic version of Touch Designer is limited. The consequence is that there is no use to work with larger video input data then the one your version of Touch Designer can handle.
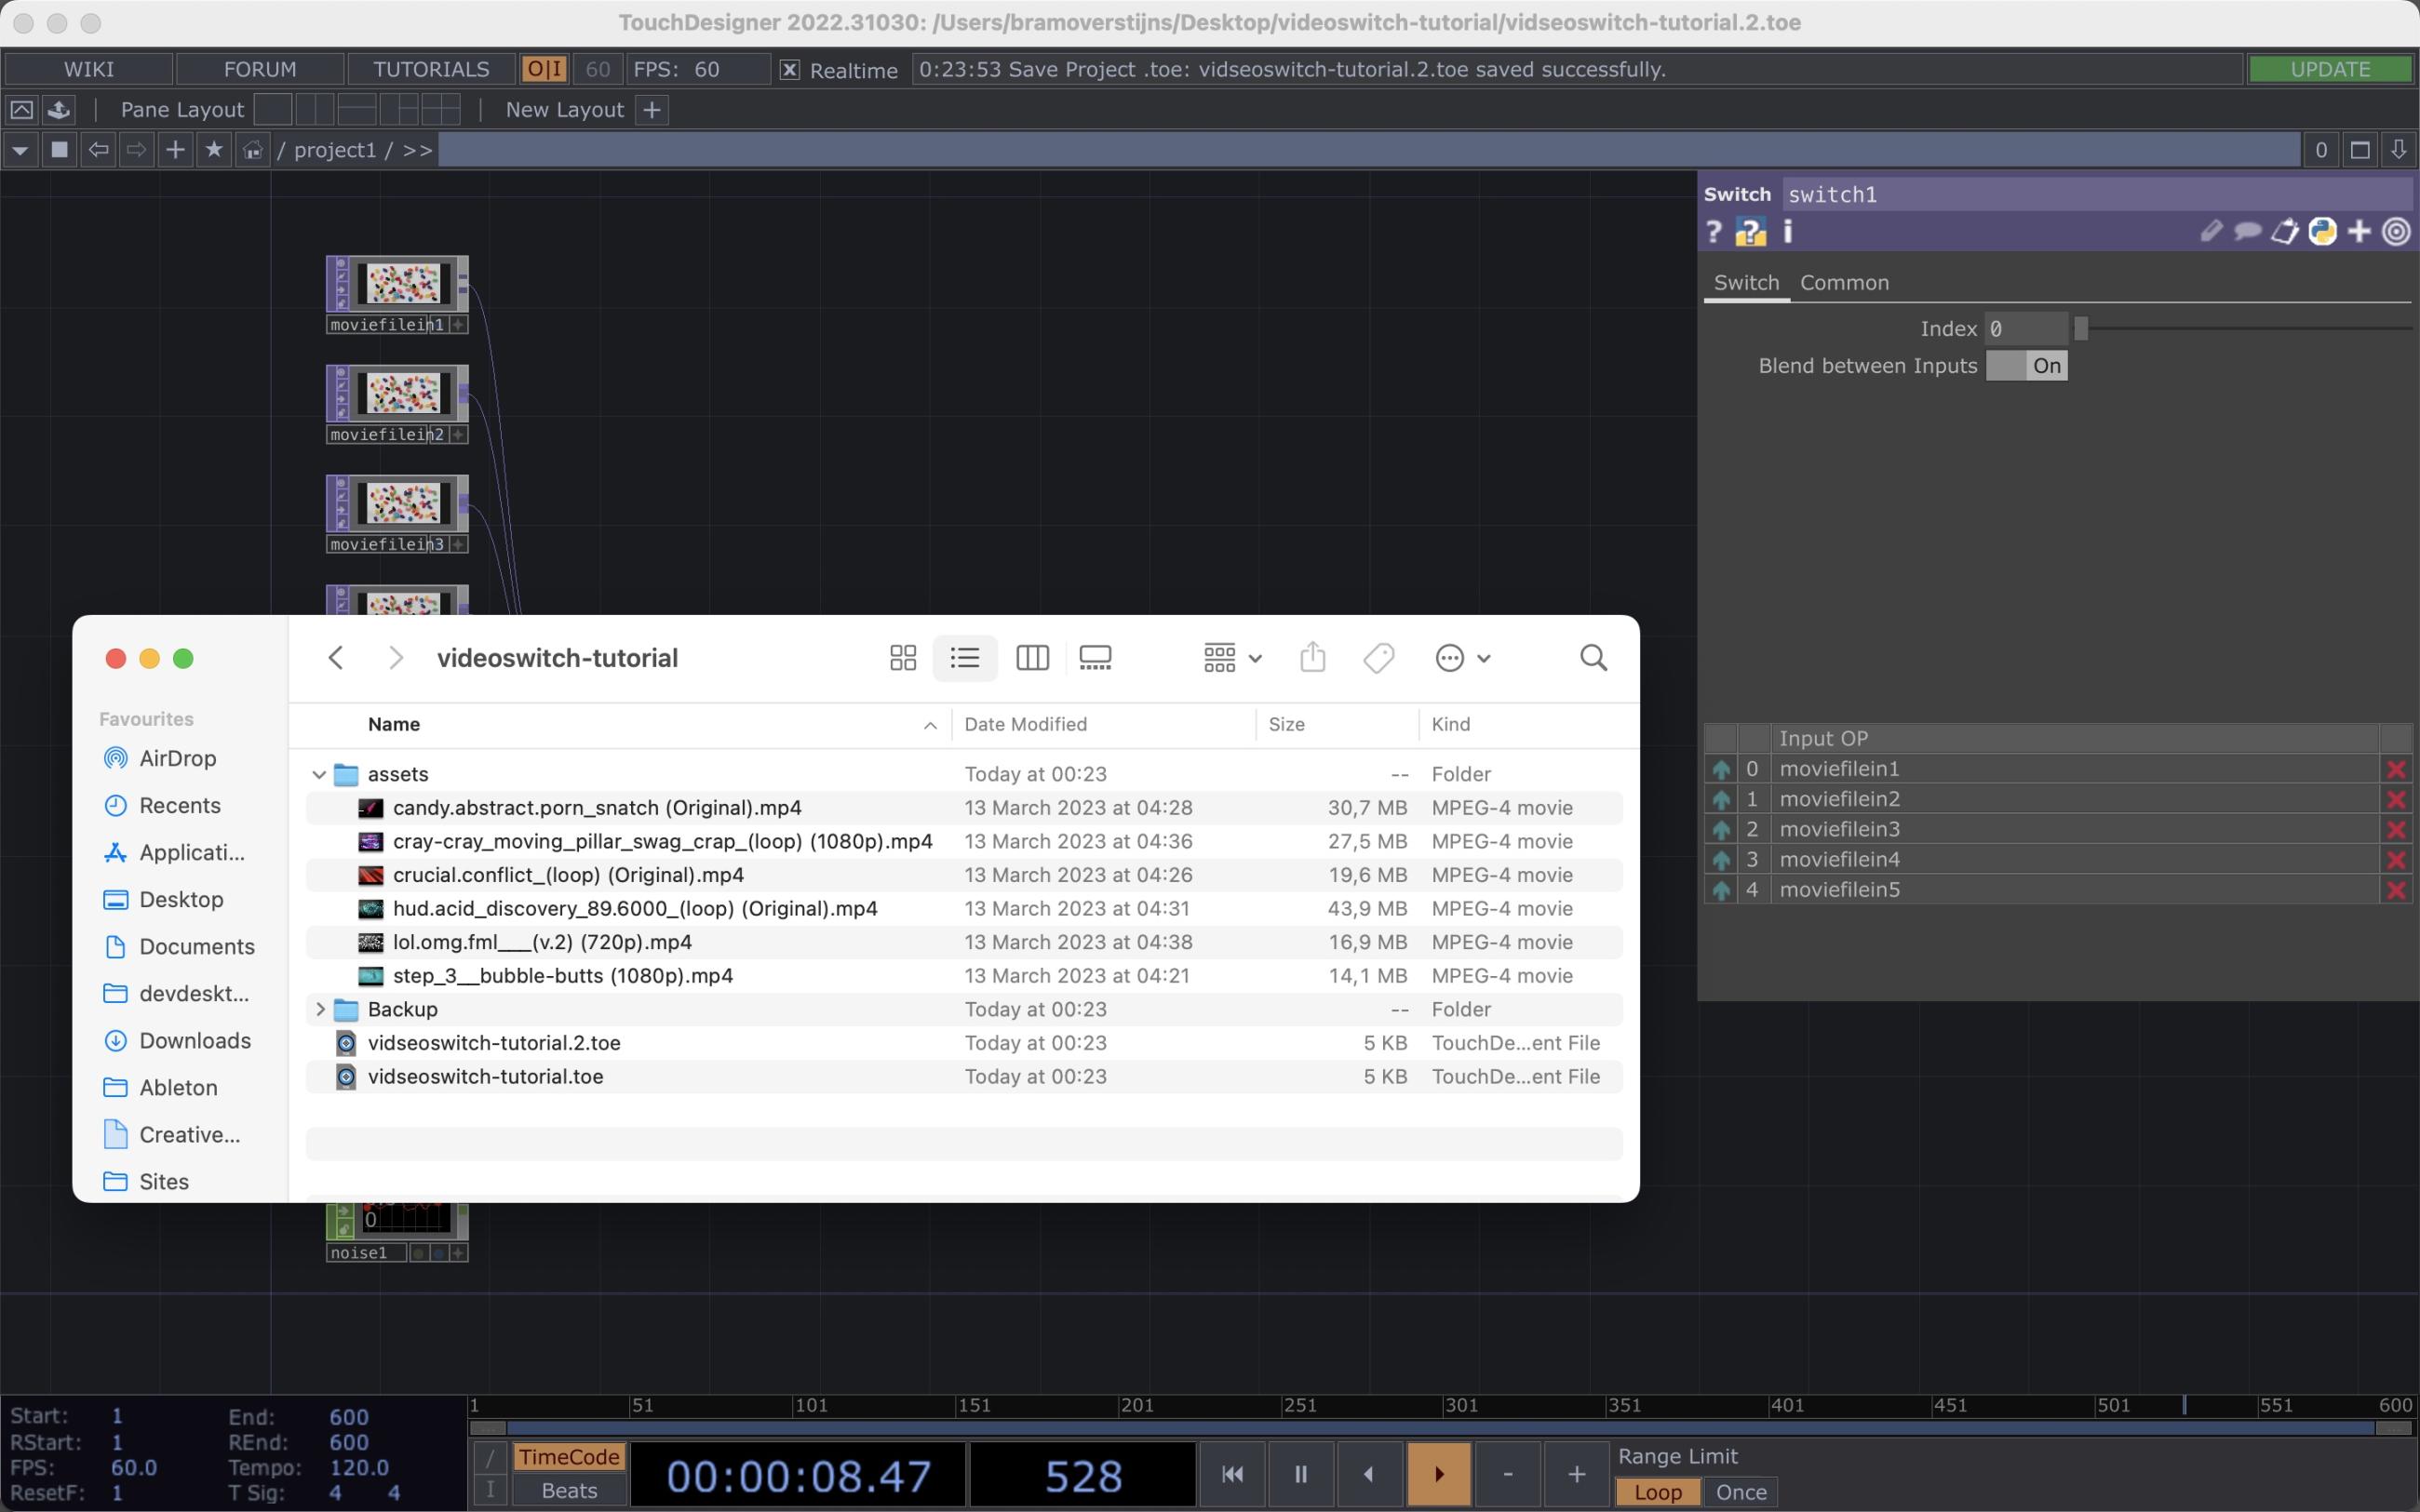
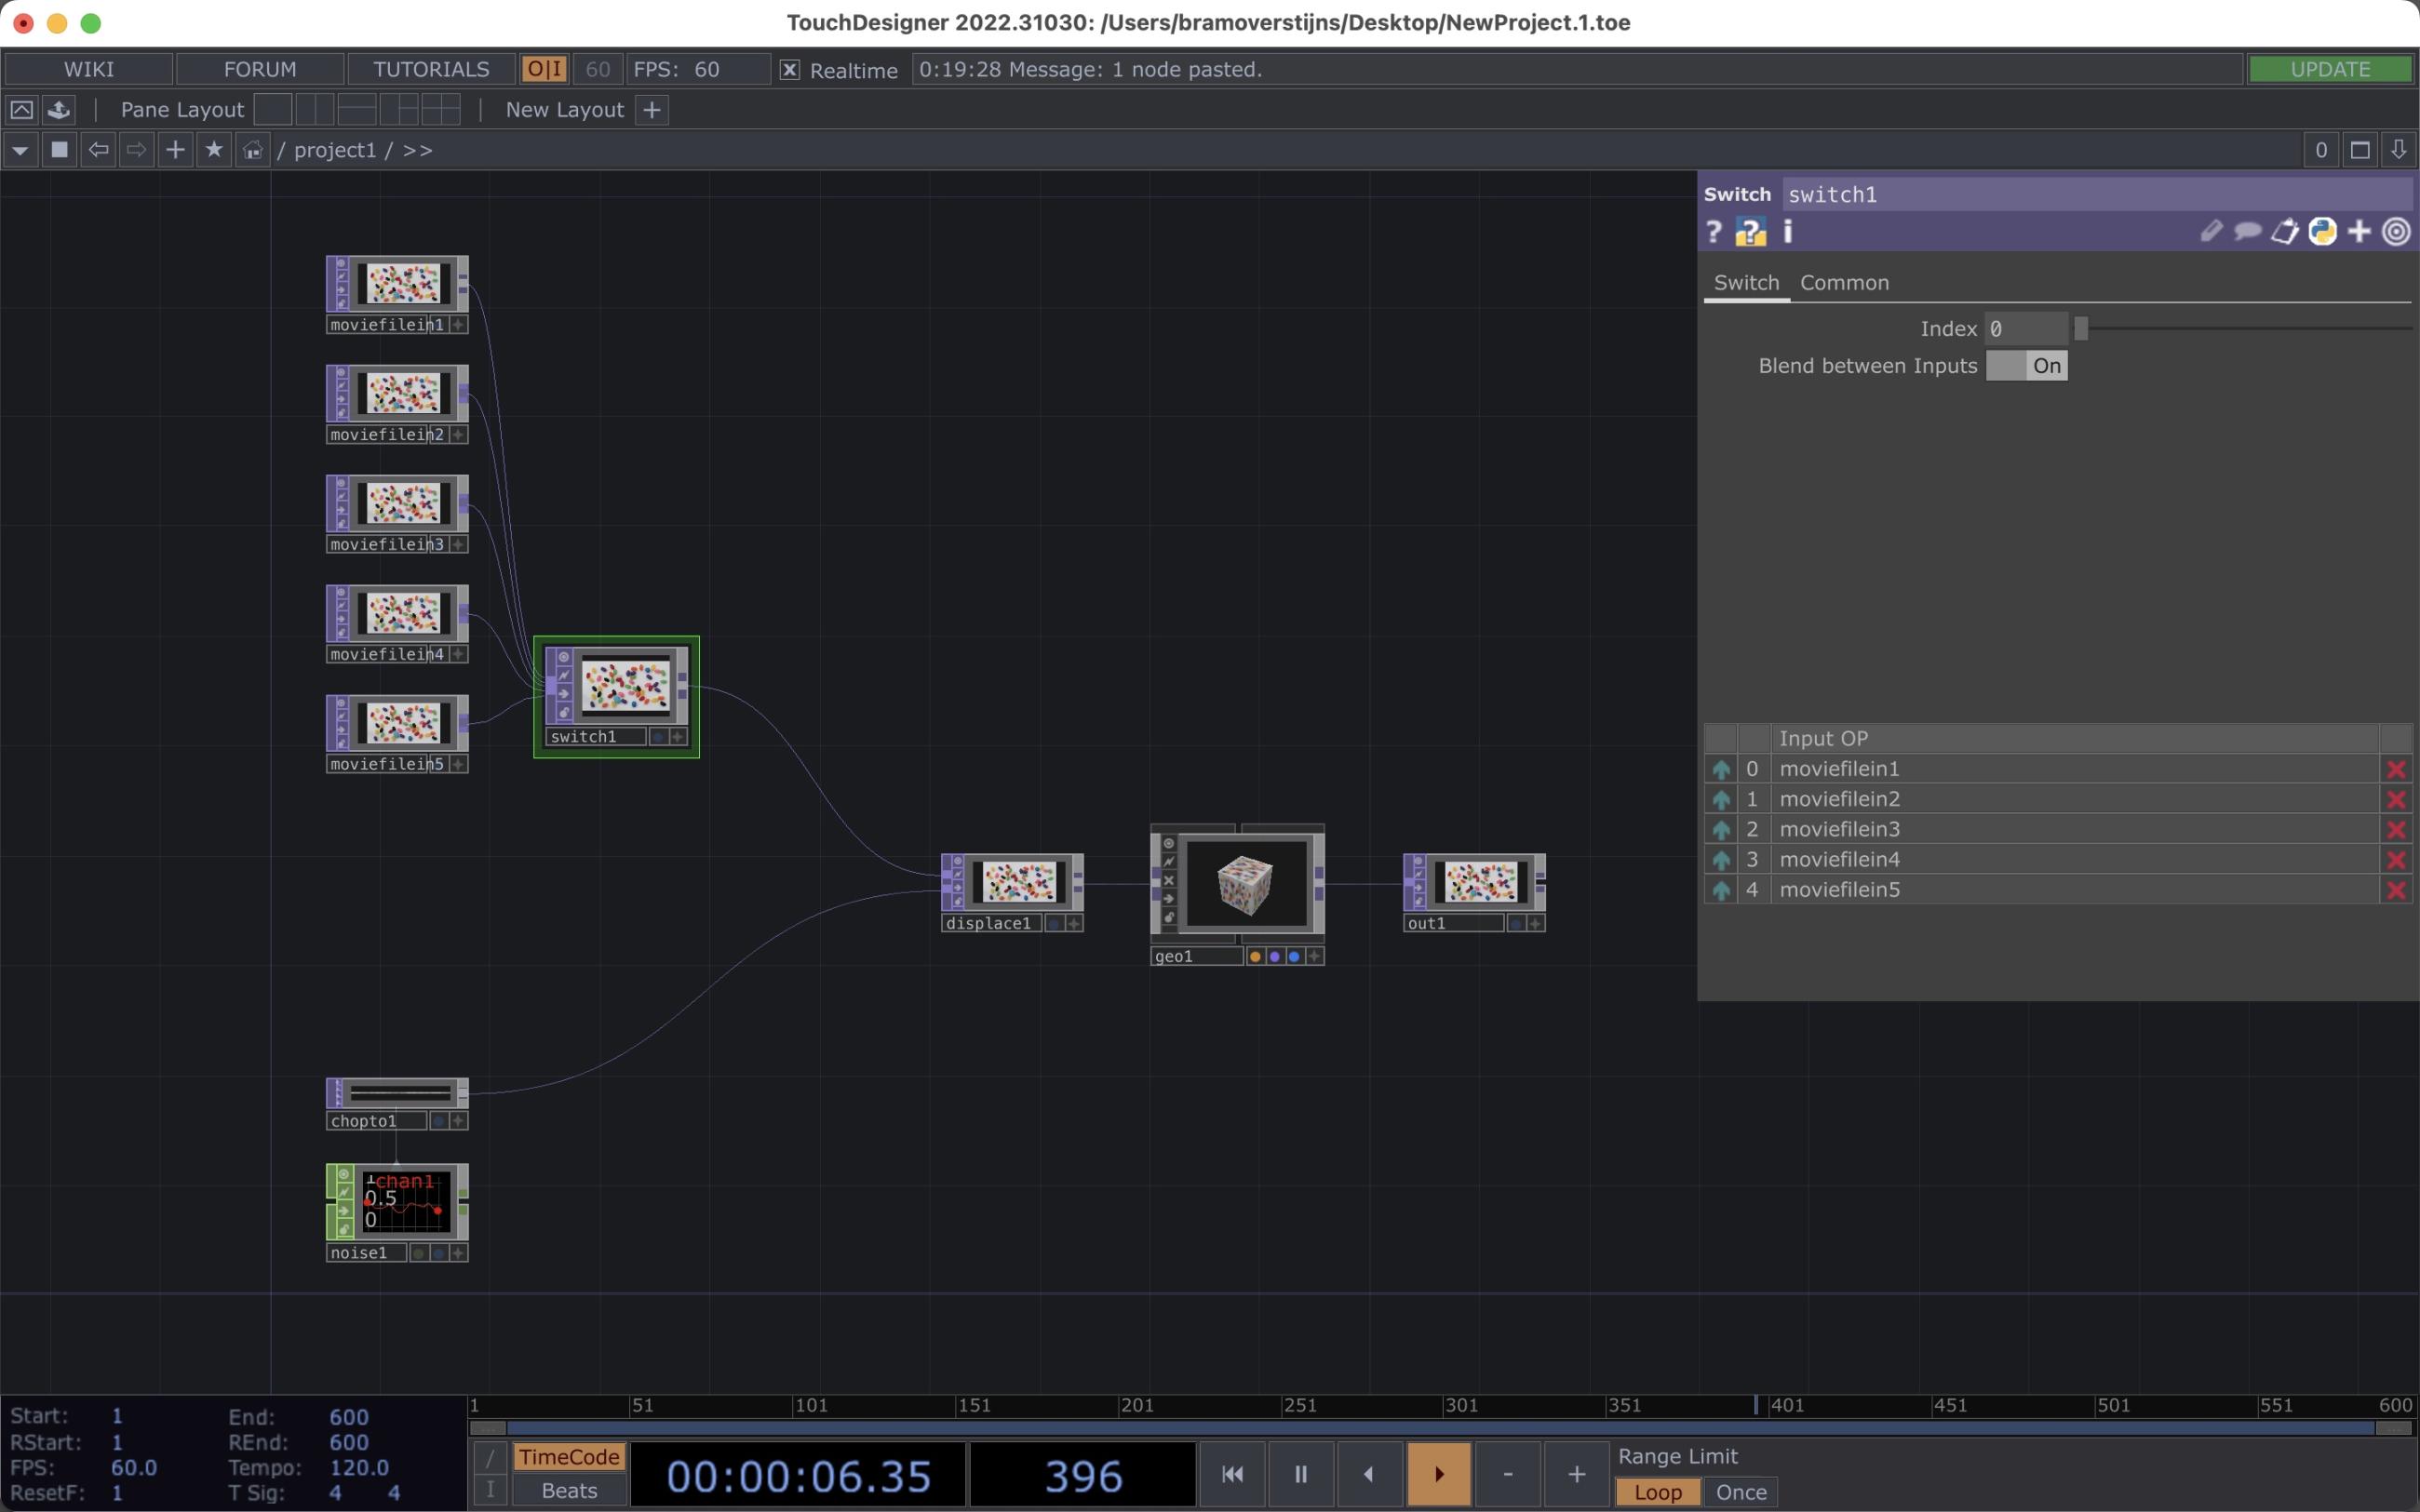
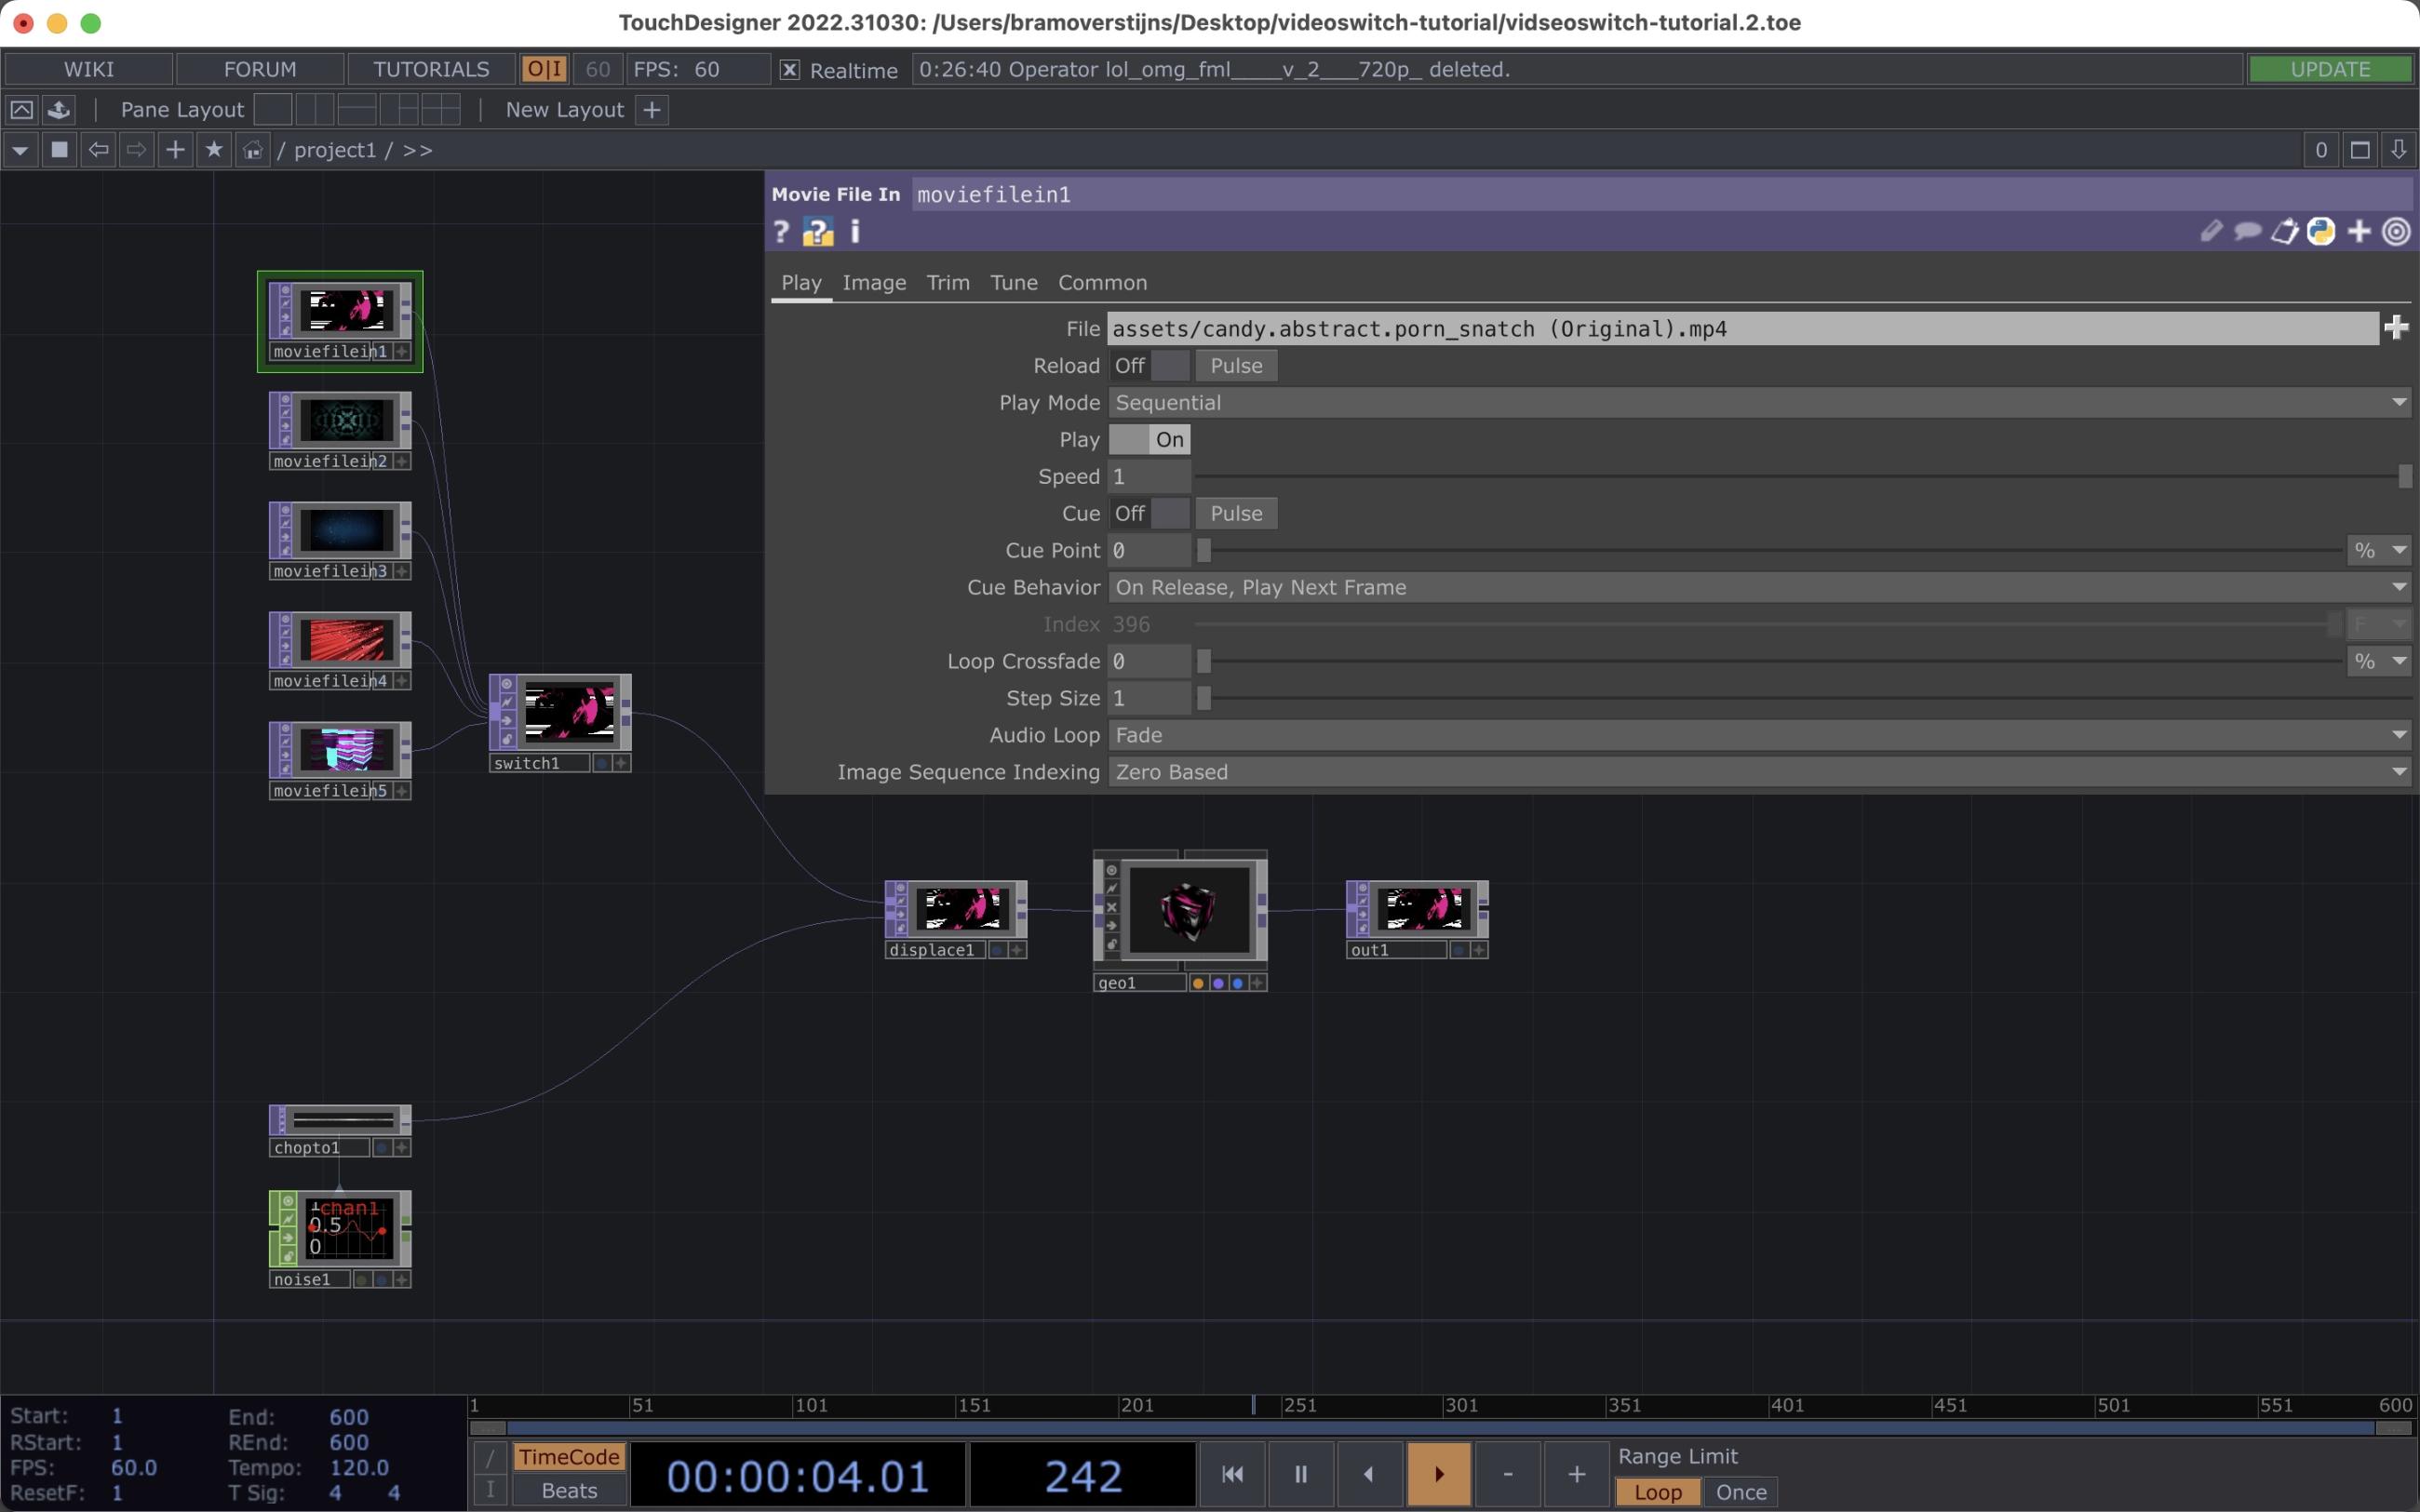
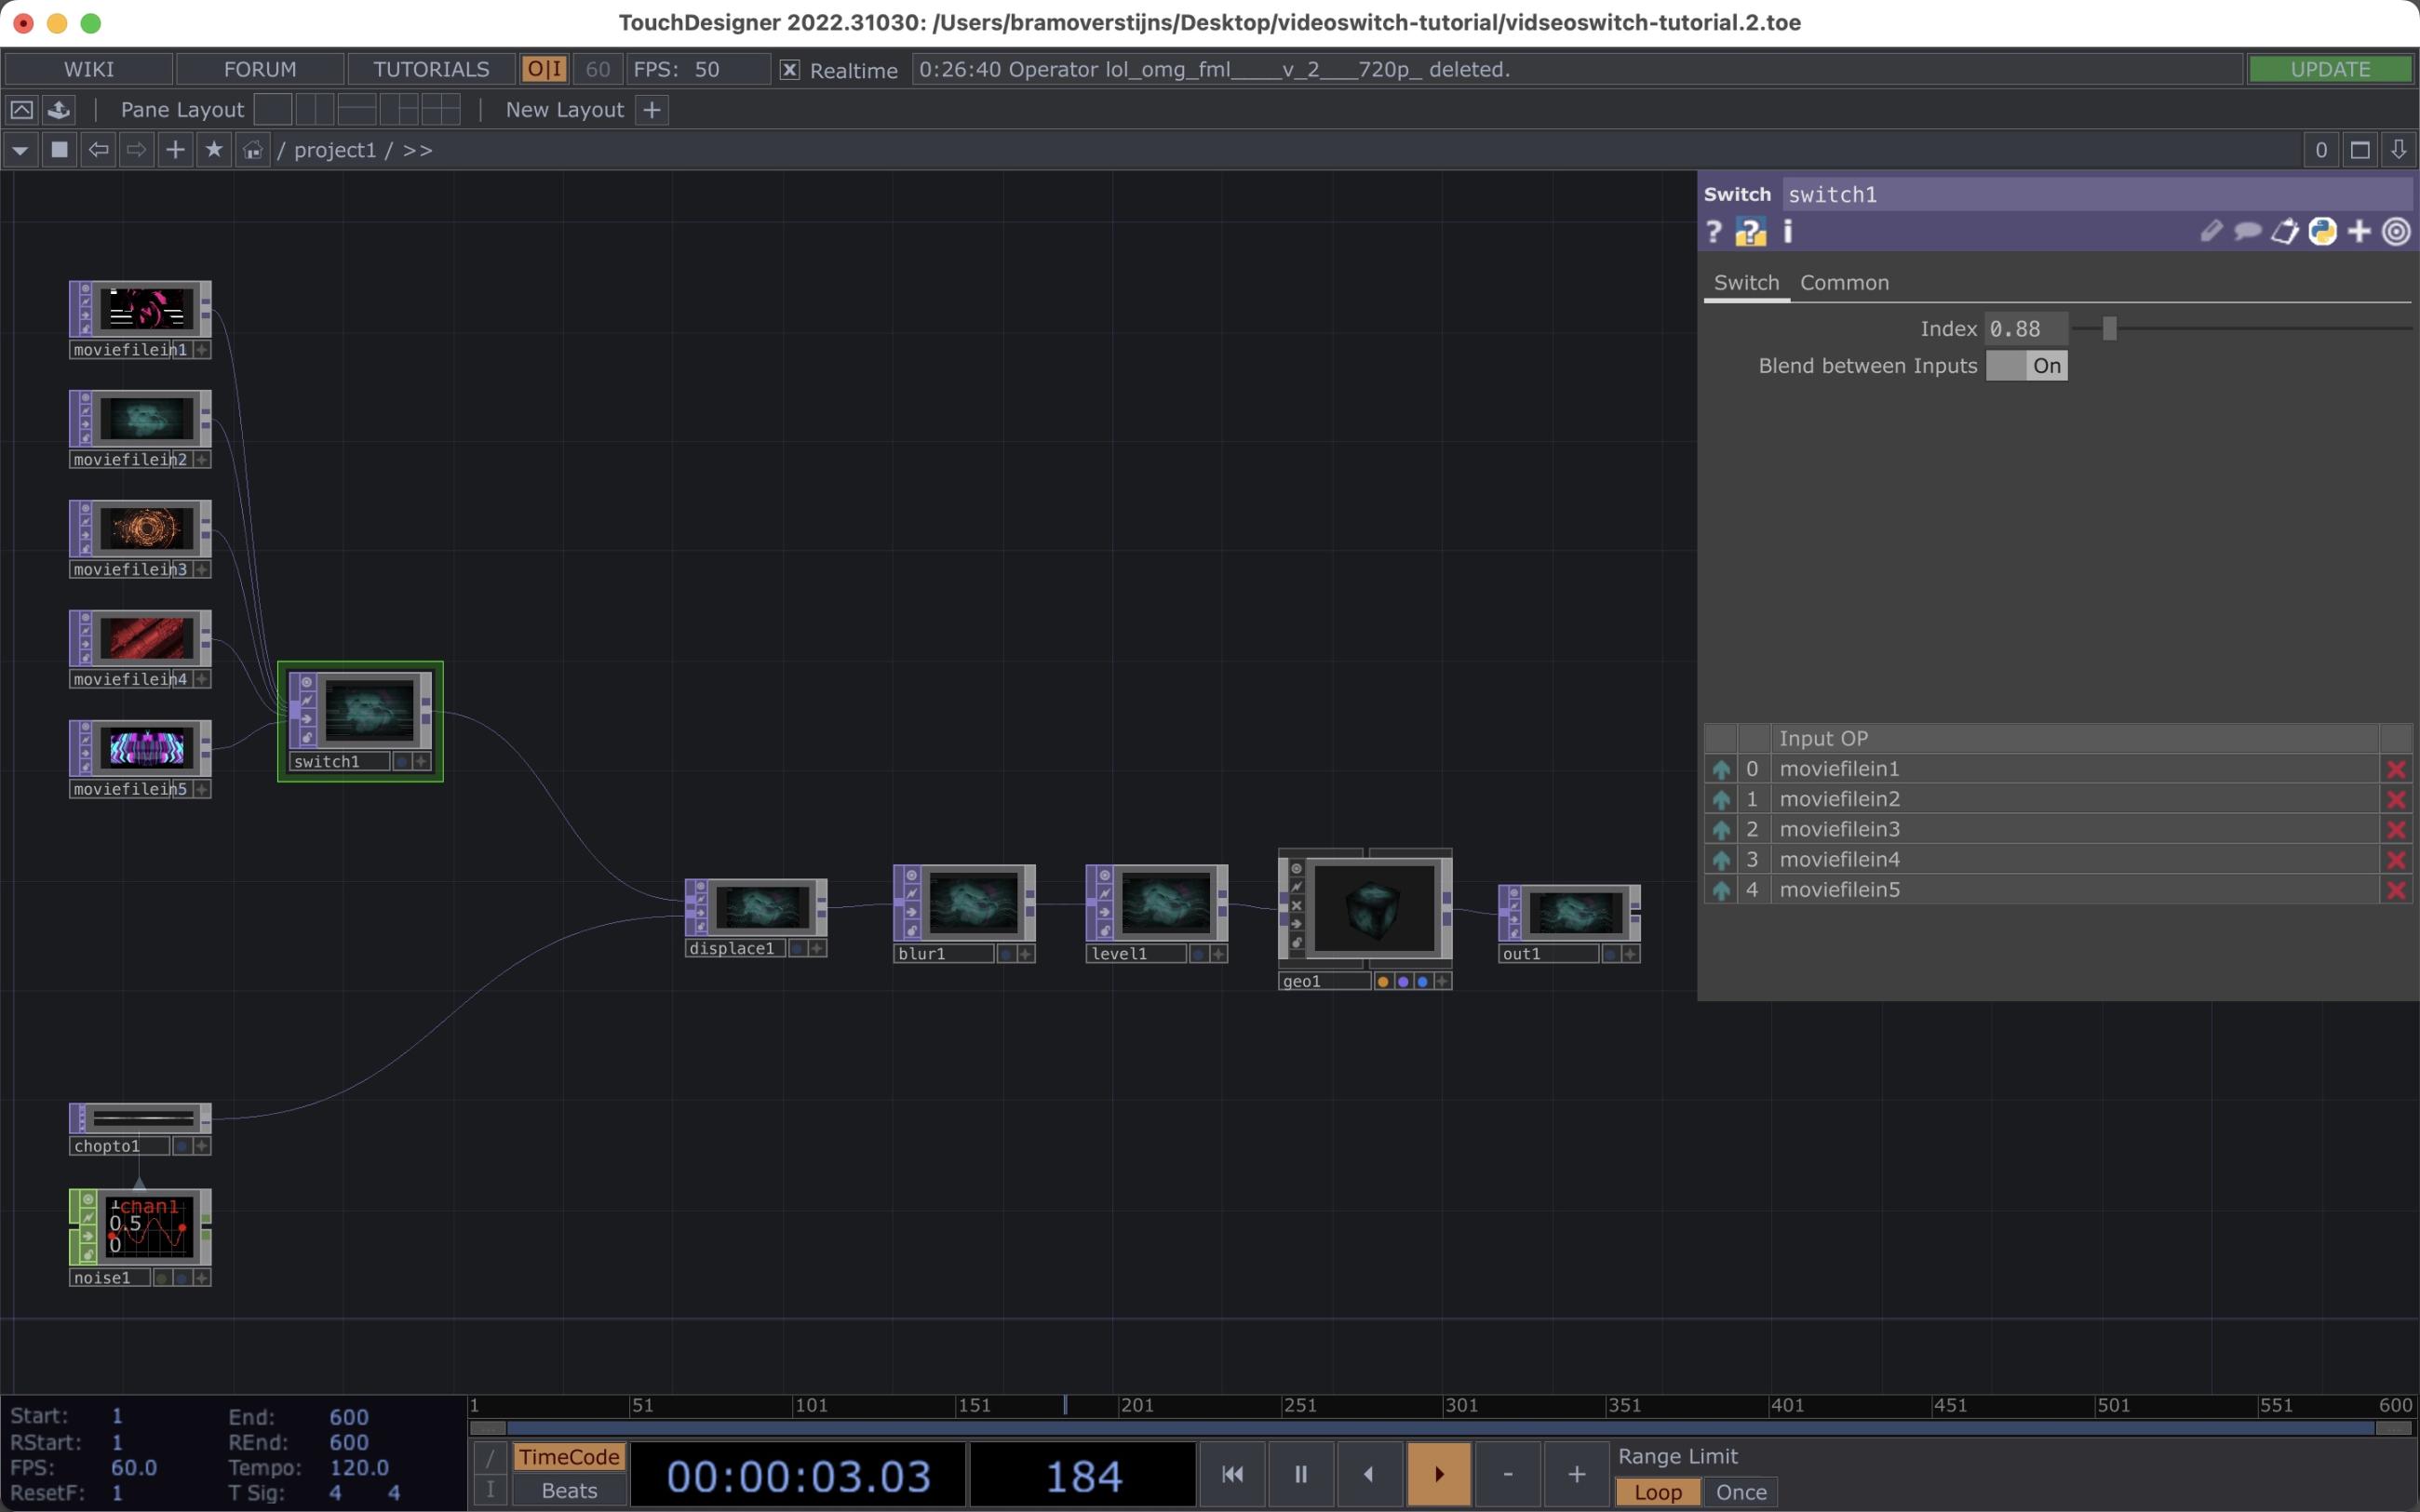
In order to change the incomming video data in our project we will need to add a switch top to our network. All incomming moviefiles have to be connected with this switch. Changing the value of the Switch top, done in the parameters window we will change the corresponding input into our network. You will get to the parrameters window by clicking a node and pressing "p". This is a basic shortcut that you will use endlessly in Touchdesigner. Mac users are urged to use Touchdesigner with a mouse that will allow you to use the right mouse button.
Getting to know the parrameters for each operator is a long process but documented on the site of Derivate. Click on the Python logo in the left upper corner of the parrameter window in order to open the corresponding help page in your browser.
More specific: Importing the videos in the corresponding MovieFileIn tops. Select the first on and open the parrameters window of this thop by clicking "p". Change the settings of the file in to "fixed". This can be achieved by clicking on the first square in front of the parrameter - the textfield of this parrameter will become white to indicate that the corresponding file will be static. In a further stage we will import video data dynamically but for now static files will do.

In order to make this work on the free version of Touchdesigner you will have to change the output resolution of all videos to 1280 on 720 pixels. This is done on the parrameter window of every MovieFileIn at the tap "common".
Working with low resolution file has advantages at this stage of your usage of Touch Designer: slow gpu's can handle the information of low resolution images better. Another advantage is that the ouput could be send to basic projectors (that are cheaper and easier to get access to).
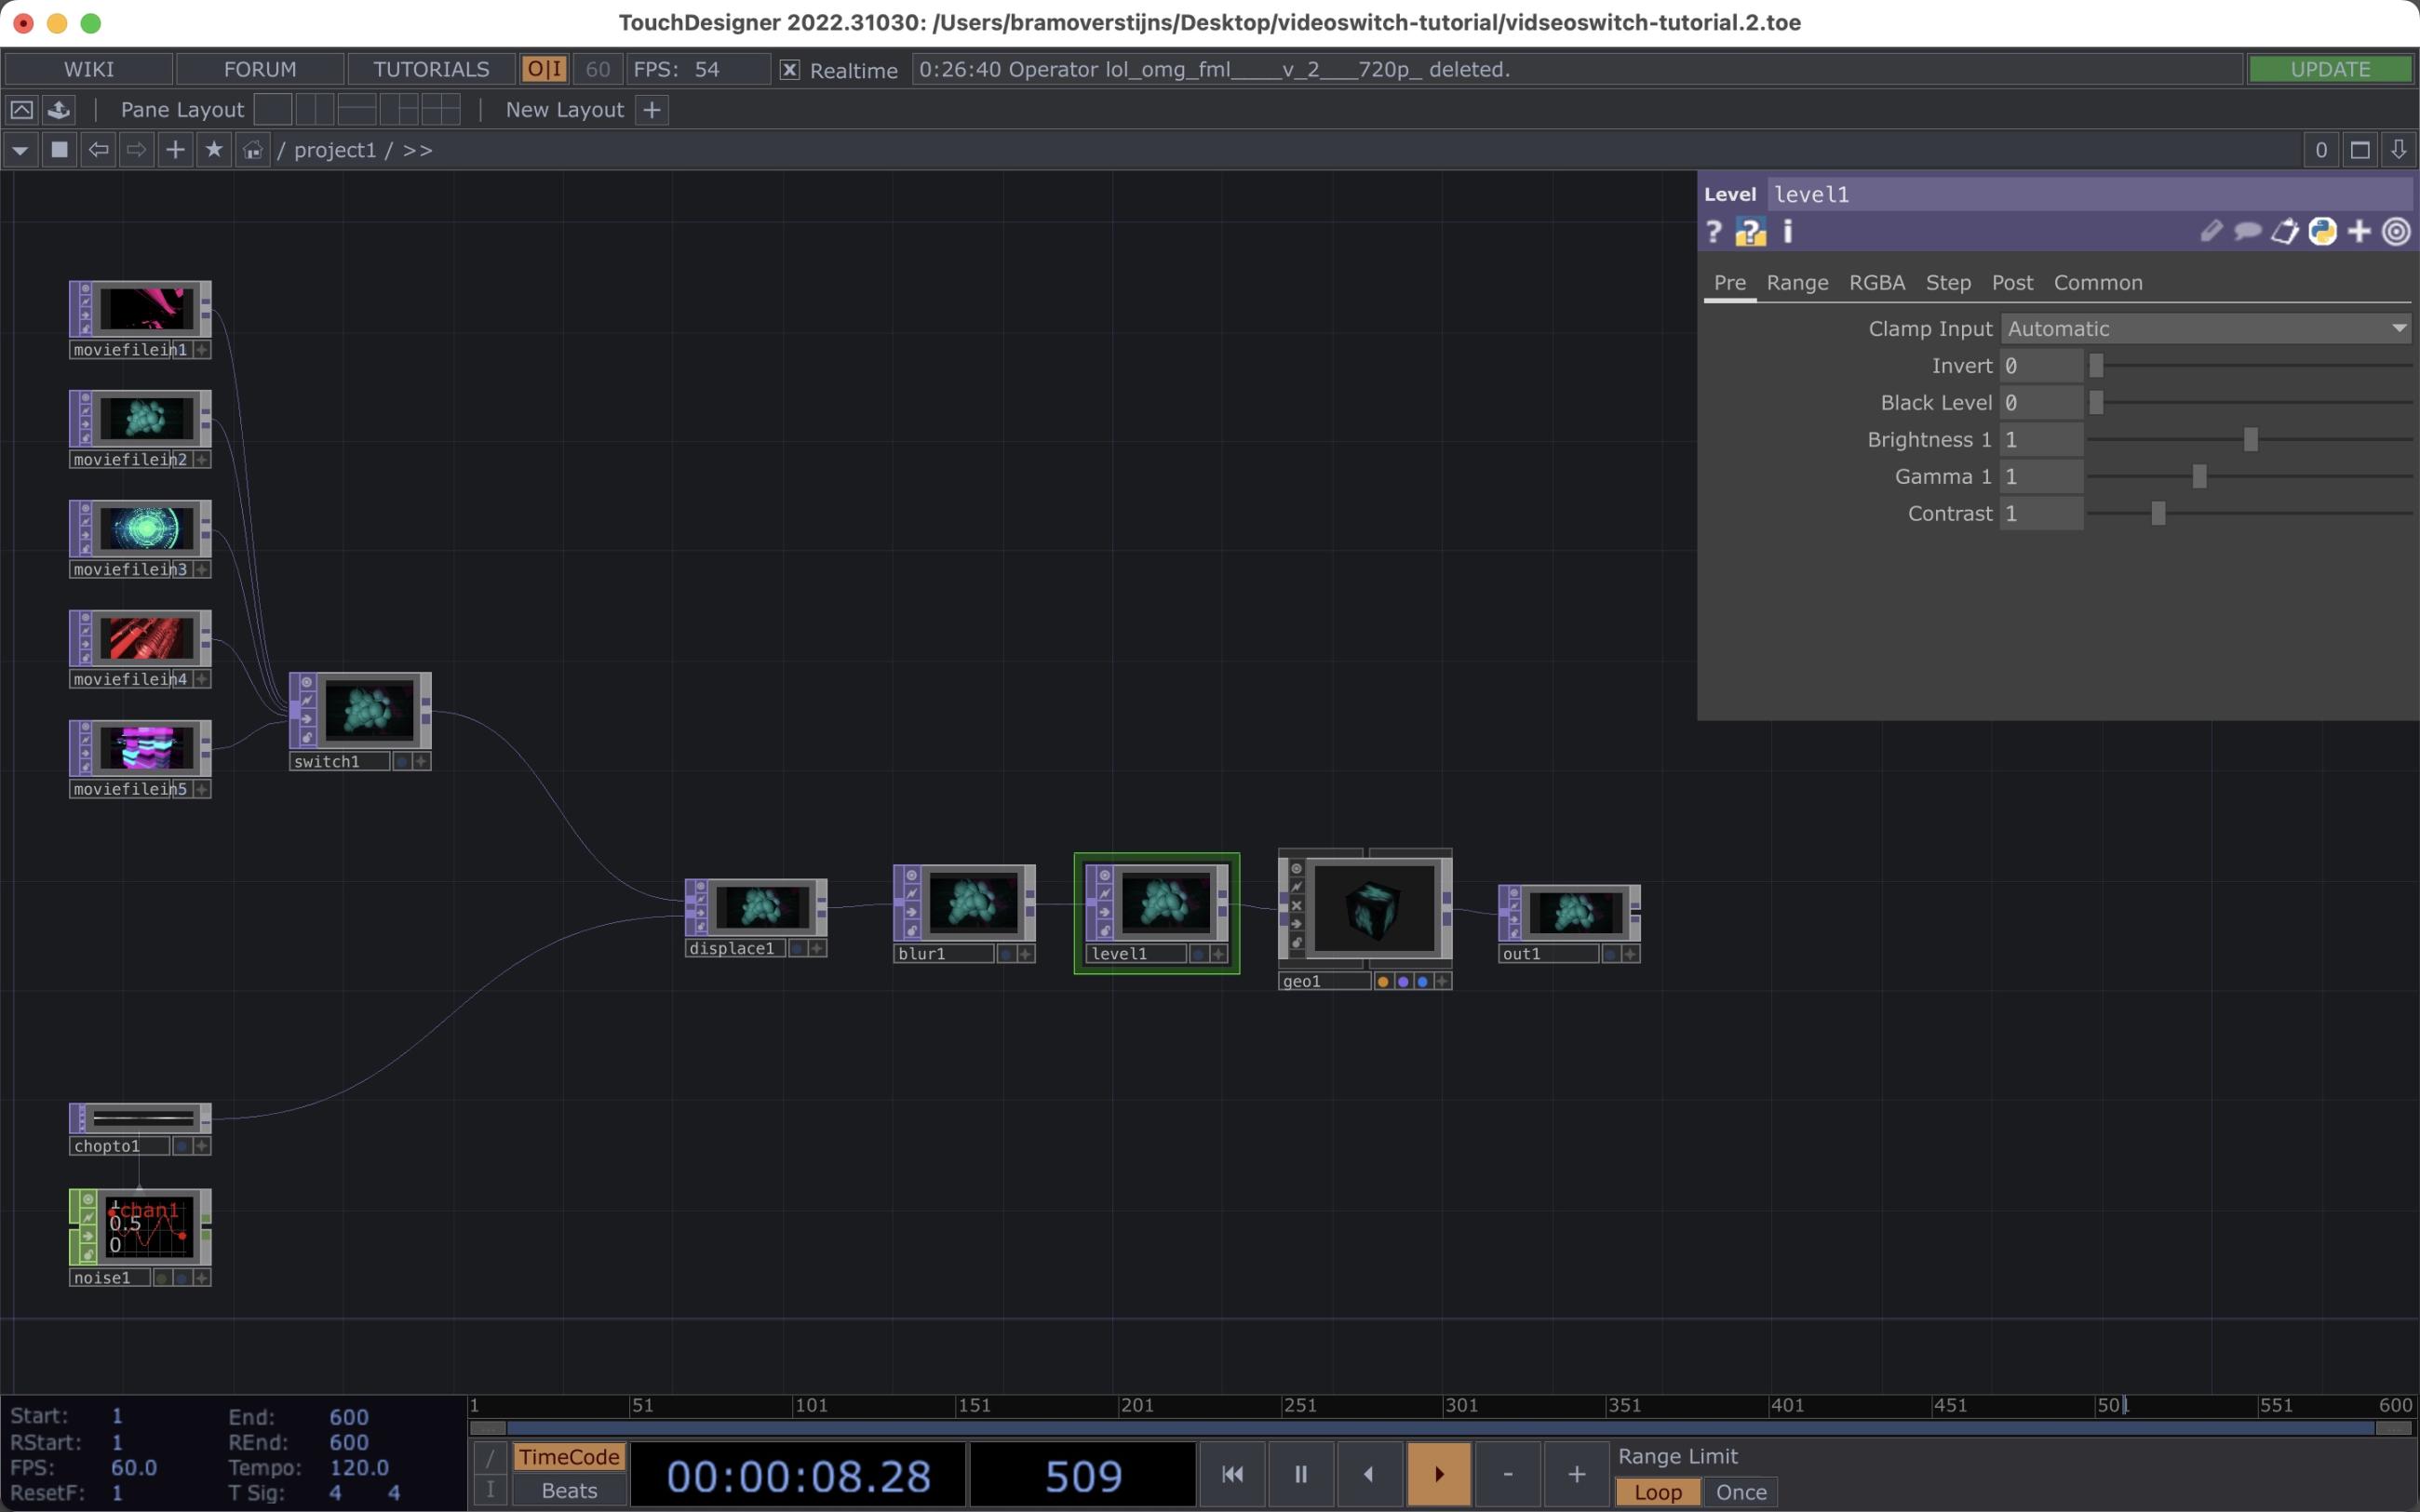
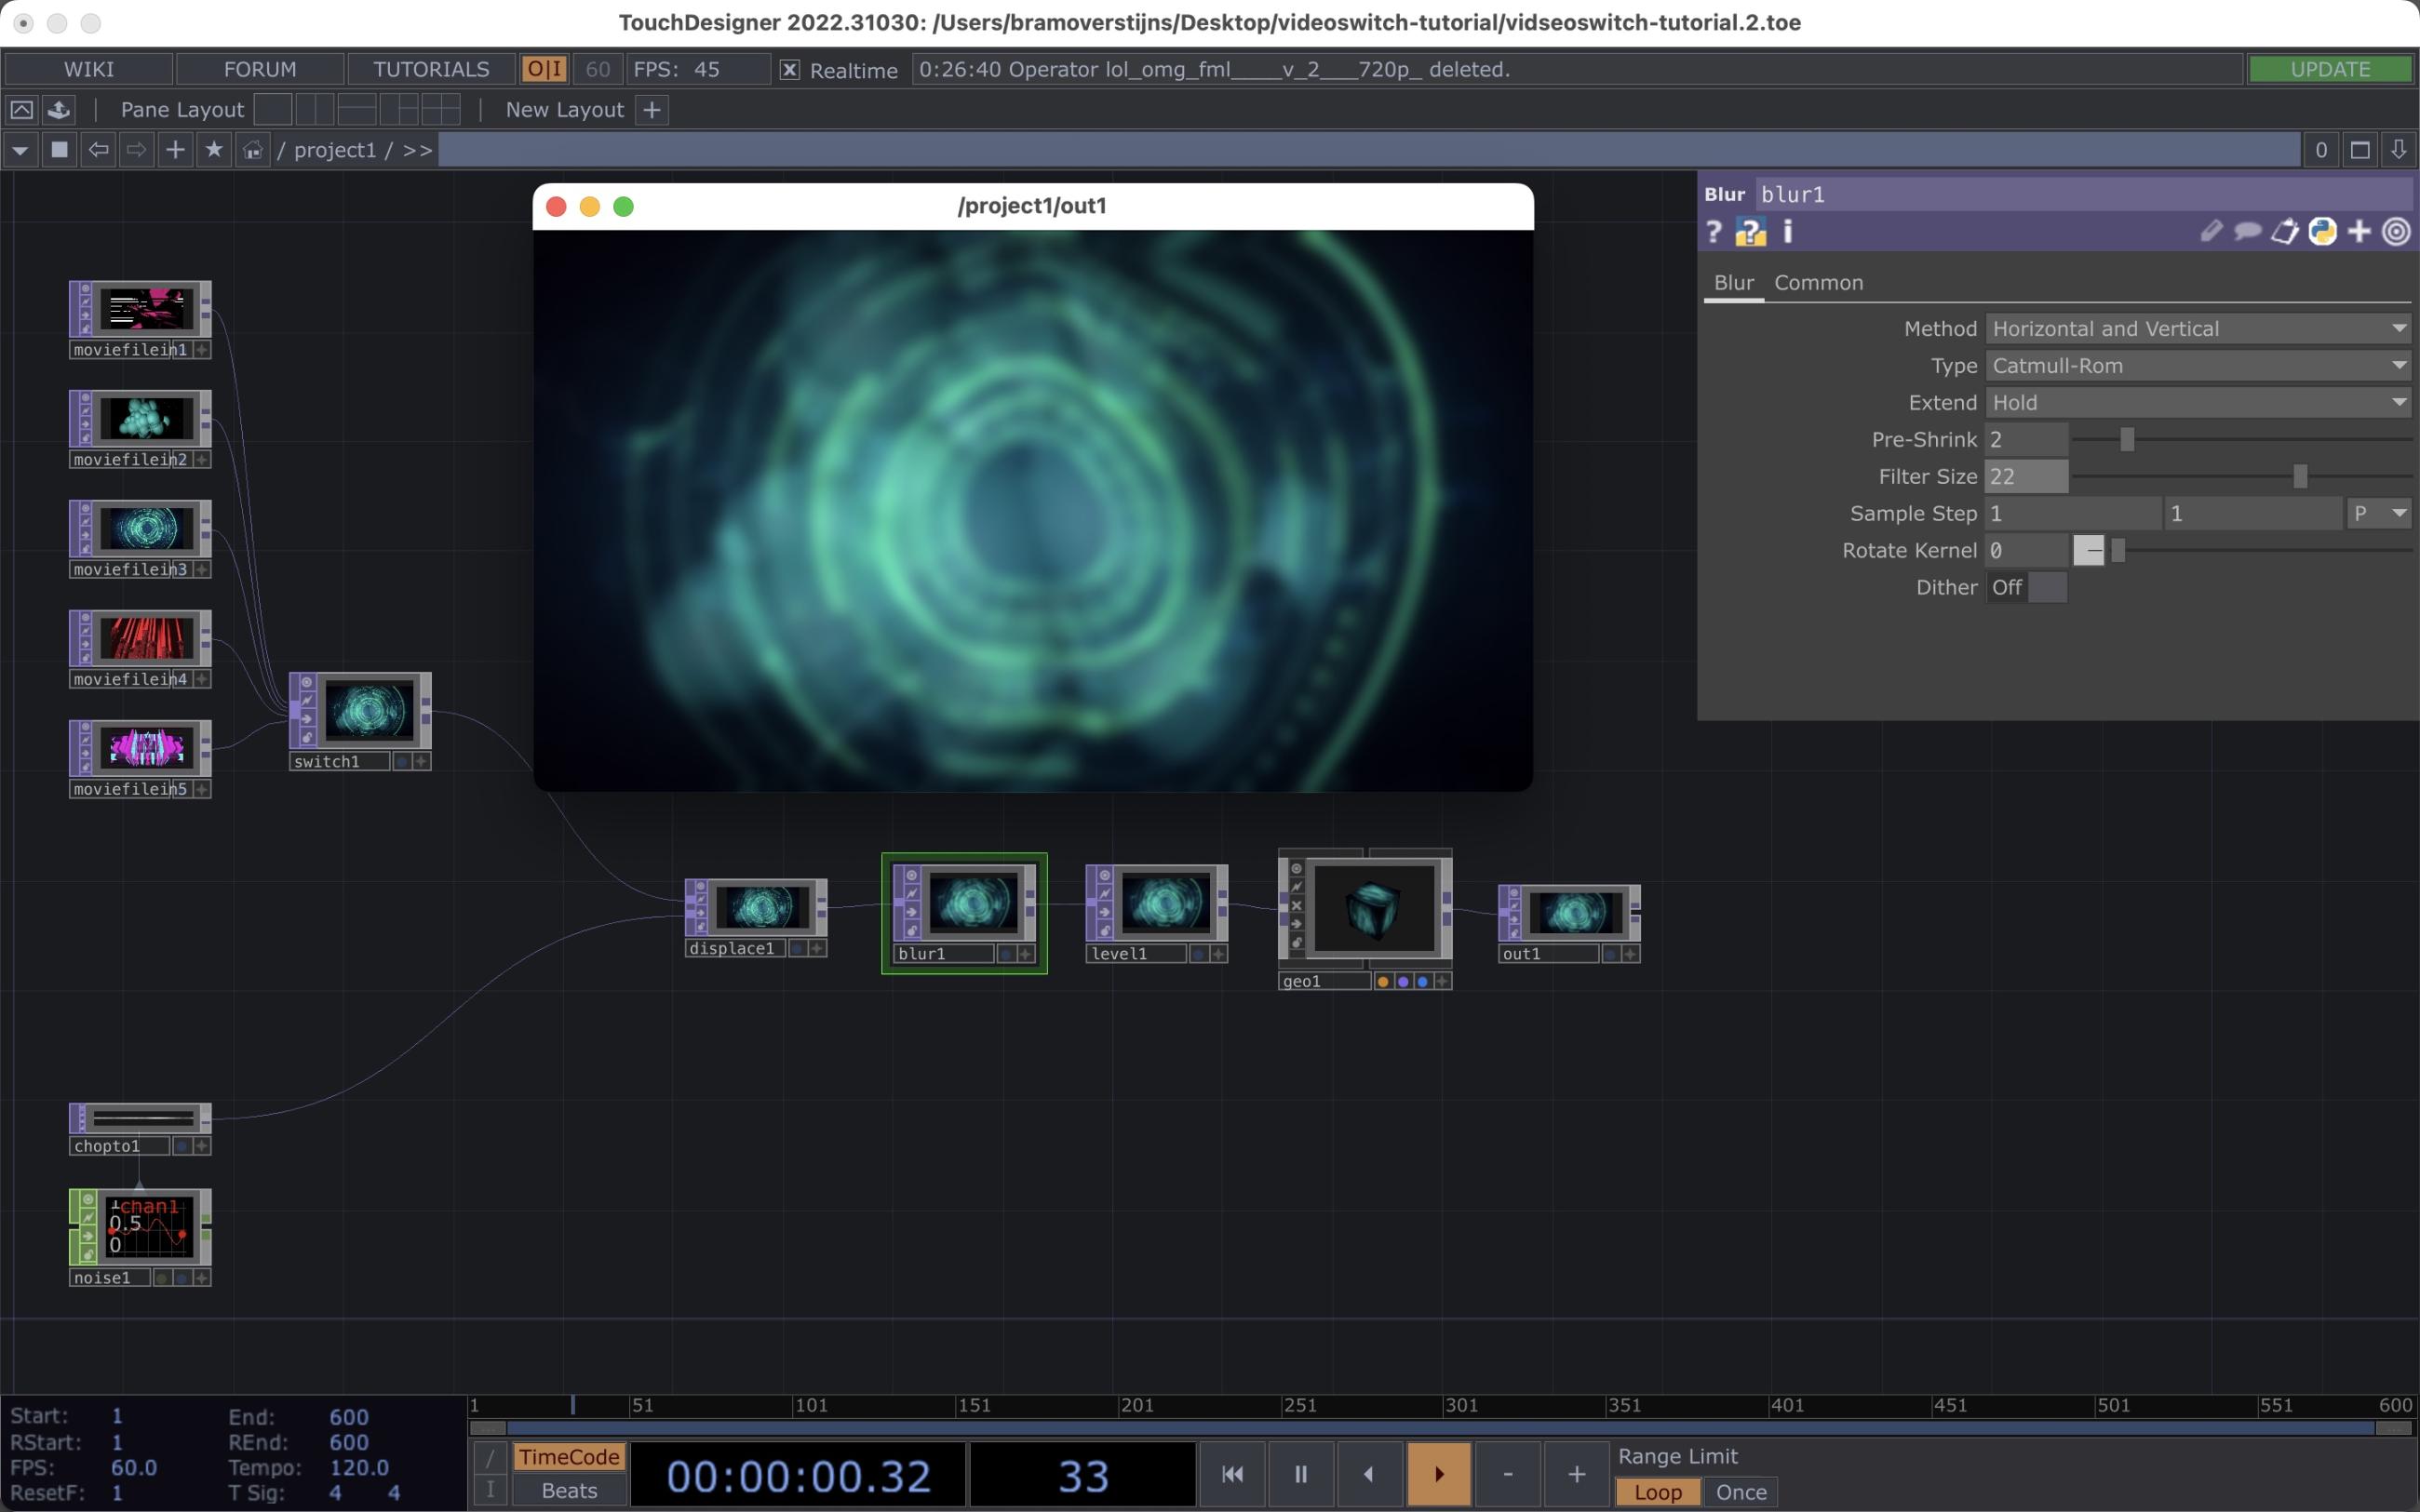
We will need to get extra effects into our network, with a strong resemblance to the image editiing techniques we will find in other pixel based software. We added a Level chop and a Blur Chop by clicking on the line of our network where we want to add the effect. The order of the effects is important while it will get other data into the next chop of our network.
All new effects have specific parrameters. In a later stage we are going to alter those effects by getting in new data (comparable with the use of "noise" data that affects the "displace effect" in the standard Touch Desiger example) from midi controllers, movement detection or sound data.
The output of our network can be shown by selecting the Out Chop and selecting "View" with the right mouse button. In a next stage we will send the output data to one projector. In a later stage we will create different outputs at the same time and send them to more then one projector.

And beyond this tutorial ...
If you grab the process of gettig image data intop your project, try to do the same with audio data. You can achieve this by putting an mp3 file in your assets folder and import the soundfile through an AudioInChop and a AudioOutChop.
The "Touch Designer example: videoswitch project" can be dowloaded here.
A short resume of the tutorial file: We start off from a blank Touchdesiger that already includes the following elements: the Movie File In TOP loads movies, still images, or a sequence of still images into TOPs. It will read images in .jpg, .gif, .tif, or .bmp format. It will read movies in QuickTime's .mov format, .mp4, .mpg, .mpeg, .avi, .wmv, .dpx Click here for more info on the movie file in top. In order to have a output we will connect it to an Out Top. Click here for more info on the Out top. In the blank file in between those operators we find a few others: the displace chop (that will displace pixels as a effect on the active video), a noise chop and a chopto, all connected to one another.
In the example we have replaced this Movie File In TOP with 5 new ones. All 5 are connected to a switch that will make us able to send other data to the output. The switch is placed before the displacement, so we can keep this effect in our example. Try out other effects, that will resemble effects that you would use in Photoshop or After Effects.

Projectors are like extra monitors on your computer. The content for extra monitors can be arranged in Touch Designer by creating “performance windows” with different dimensions and outputs.
Projectors are like extra monitors on your computer. The content for extra monitors can be arranged in Touch Designer by creating “performance windows” with different dimensions and outputs.
